Windows 10 now lets you increase the mouse cursor’s size and change its color. Want a black mouse cursor instead? You can choose that! Want a huge red cursor that’s easier to see? You can choose that, too!
This feature was added to Windows in the May 2019 Update. It was always possible to customize the mouse cursor theme, but now you can do so without installing custom pointer themes.
To find this option, head to Settings > Ease of Access > Cursor & Pointer. (You can press Windows+I to open the Settings application quickly.)
To change the pointer’s size, drag the slider under “Change the Pointer Size.” By default, the mouse pointer is set to 1—the smallest size. You can choose a size from 1 to 15 (which is very large).
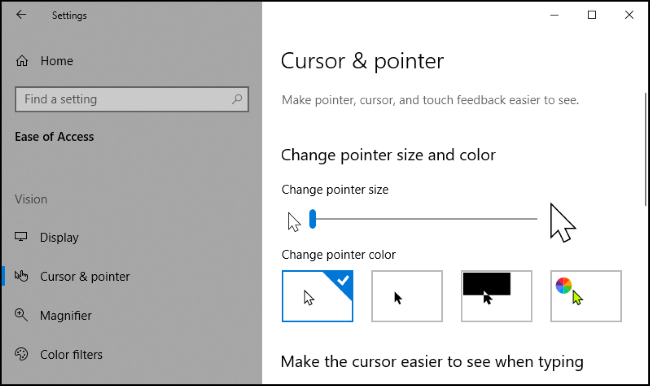
Choose a new color in the “Change Pointer Color” section. There are four options here: white with a black border (the default), black with a white border, inverted (for example, black on a white background or white on a black background), or your selected color with a black border.
If you choose the color option, a lime green cursor is the default. However, you can choose any color you like. From the “Suggested Pointer Colors” panel that appears, select “Pick a Custom Pointer Color,” and then choose the one you want.

Read the remaining 5 paragraphs
Source : How to Change the Mouse Pointer Color and Size on Windows 10


