Although most advertisements have made their way online, you can’t deny the power of a flyer. If you have a product or service you’re selling and want to post a flyer on your local bulletin board, vertical tear-offs at the bottom make it easy for people to grab your contact info. Here’s how to make them in Word.
Creating Vertical Tear-Offs
Make sure the meat of your flyer contains enough content and design to attract passerby. Microsoft provides a few flyer templates that can get you going in the right direction, or you can create your own. However, make sure you leave enough white space at the bottom to give room for your vertical tear-offs.
Once you’re finished with the flyer’s content and design, it’s time to create your vertical tear-offs.
As we mentioned before, it’s important to leave enough space at the bottom for the tear-offs. A good rule of thumb is to give the bottom of the page a 3” margin (which is what we’re going with in our example), but it depends on how much information you plan to put in your tear-offs.
To set the margin, go to the “Layout” tab and click the “Margins” button.
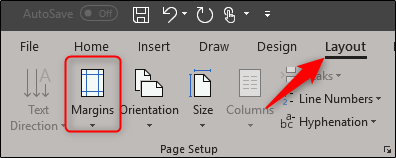
From the drop-down menu, choose the “Custom Margins” option at the bottom.

Read the remaining 30 paragraphs
Source : How to Make Vertical Tear-Off Pages in Microsoft Word