Windows 10 offers a few ways to help you find your mouse pointer, which can be a problem on high-definition and laptop screens. Sometimes, just slowing down the speed it moves solves the problem, but you can also make it more visible and even have Windows locate it for you.
How to Change the Speed of Your Pointer
One of the first things we’re going to change is the speed at which the pointer moves. Perhaps the only reason you’re unable to see it is that it’s darting across the screen too fast. Slowing it down will give you a chance to locate it before it ends up hiding at the very edge of your screen.
Open up Control panel, head to Control Panel > Hardware and Sound > Mouse, and click on the “Pointer Options” tab at the top of the window.
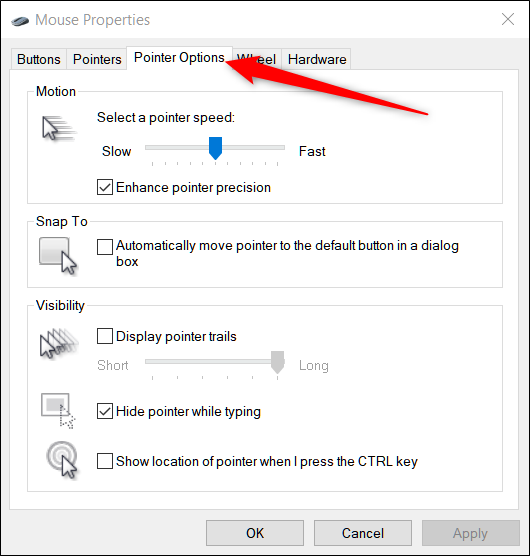
The Motion slider here dictates the speed at which your pointer will move. Sliding to the right to make it faster; slide to the left to slow it down. You’ll have to experiment to find the right setting for you. What you’re looking for is something fast enough that you can get across the full width of your display without too much hand movement, but not so fast that your pointer disappears on you.

Also, depending on your mouse, Windows has an advanced precision feature you can enable by ticking the box underneath the slider marked “Enhance Pointer Precision.”

Read the remaining 22 paragraphs
Source : How to Make Your Mouse Pointer Easier to See in Windows 10