A smart mirror can show your calendar, weather, and news like something out of a sci-fi movie. Powered by a Raspberry Pi, you can build your own with some simple tools and hardware.
Beautiful, Configurable, and Custom-Built
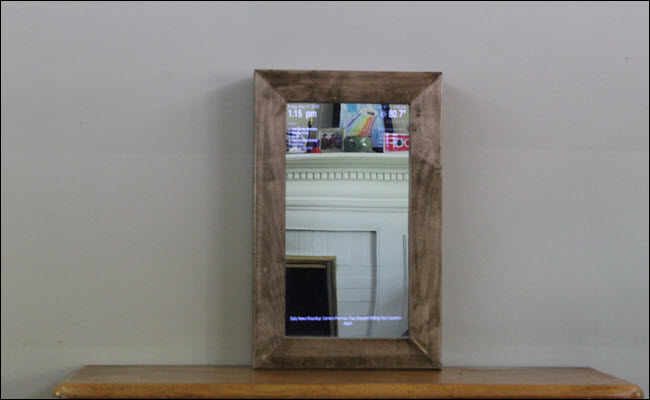
Smart mirrors have been around awhile, and the most prominent version comes from Michael Teeuw. The idea is pretty simple; you’ll build a frame and box. Inside the box, you’ll place one-way glass (often seen on TV in police dramas), a monitor, a Raspberry Pi, and the cables necessary to power your setup. Michael and other contributors have created an open-source Magic Mirror platform you can install. Once installed, you can customize it to show your calendar, weather, news, and more. Installing the software is easy—it requires just one line of code.
The harder parts are creating the frame box, setting up the Raspberry Pi, and then customizing the software to show your preferred information. But even someone with little to no experience with woodworking and code can build this DIY project with a bit of patience in a weekend or two. The longest parts are passive, like waiting for glue and stain to dry. You’ll spend about three to five hours actively working on the frame and installing the software.
And we’ll show you exactly how.
The Materials You’ll Need
Depending on what you already have, this project can either be inexpensive or expensive. If you bought every item in the following list, you’d spend around $700. But because we had everything on hand except the glass and wood, we only spent $140. And remember, you don’t have to buy the tools. If you have a friend who owns some, ask if you can borrow them.
To get started you’ll need the following:
- A monitor: Preferably at least 24 inches, and one you don’t care about losing. Something thinner and lighter is better, but this monitor by Sceptre would work. You’ll need to remove the stand. It’s also helpful (but not necessary) to remove the frame from the monitor.
- Two-way Glass: Your glass should be a little larger than the dimensions of your monitor. The product we linked on Amazon is a generic size, but we had good luck ordering from a local glass supplier.
- One Raspberry Pi 3
- A Raspberry Pi case
- Wood stain or paint
- Polyurethane (if staining)
- Wood filler (if staining, get stainable wood filler)
- Sandpaper in 80, 120, and 220 grit (omit 220 if you decide to paint)
- A miter saw (or handsaw and protractor)
- Wood glue
- A measuring tape.
- A ruler or other straight edge (for drawing straight lines).
- Painters tape
- Bungee cords
- Short wood screws
- Shims
- Nylon strap
- A screwdriver
- Heavy duty frame hooks (if hanging)
- Ear, eye, and breathing protection. Add a vapor filter if you’re applying polyurethane without ventilation.
- Wood to build the frame and box: We recommend hardwood like Maple or Walnut at least one inch thick. You’ll also want something thin like plywood to make the back of the box if you aren’t hanging the frame. How much wood and how wide depends on your monitor (see more in building the frame.)
For a more straightforward build, we have a few advanced options. These are not necessary, but they’ll help:
- F-Clamps (at least four)
- Corner clamps (at least two)
- Putty knife
- A random orbital sander
- Hook and loop sandpaper in 80, 120, and 220 grits.
- Drill
Building the Frame

To start, you’re going to make a basic frame (like the one you might find hanging on your wall). Then you’ll add a simple box to hold the mirror, monitor, Raspberry Pi, and cabling. When completed, the structure might resemble a very shallow medicine cabinet.


